
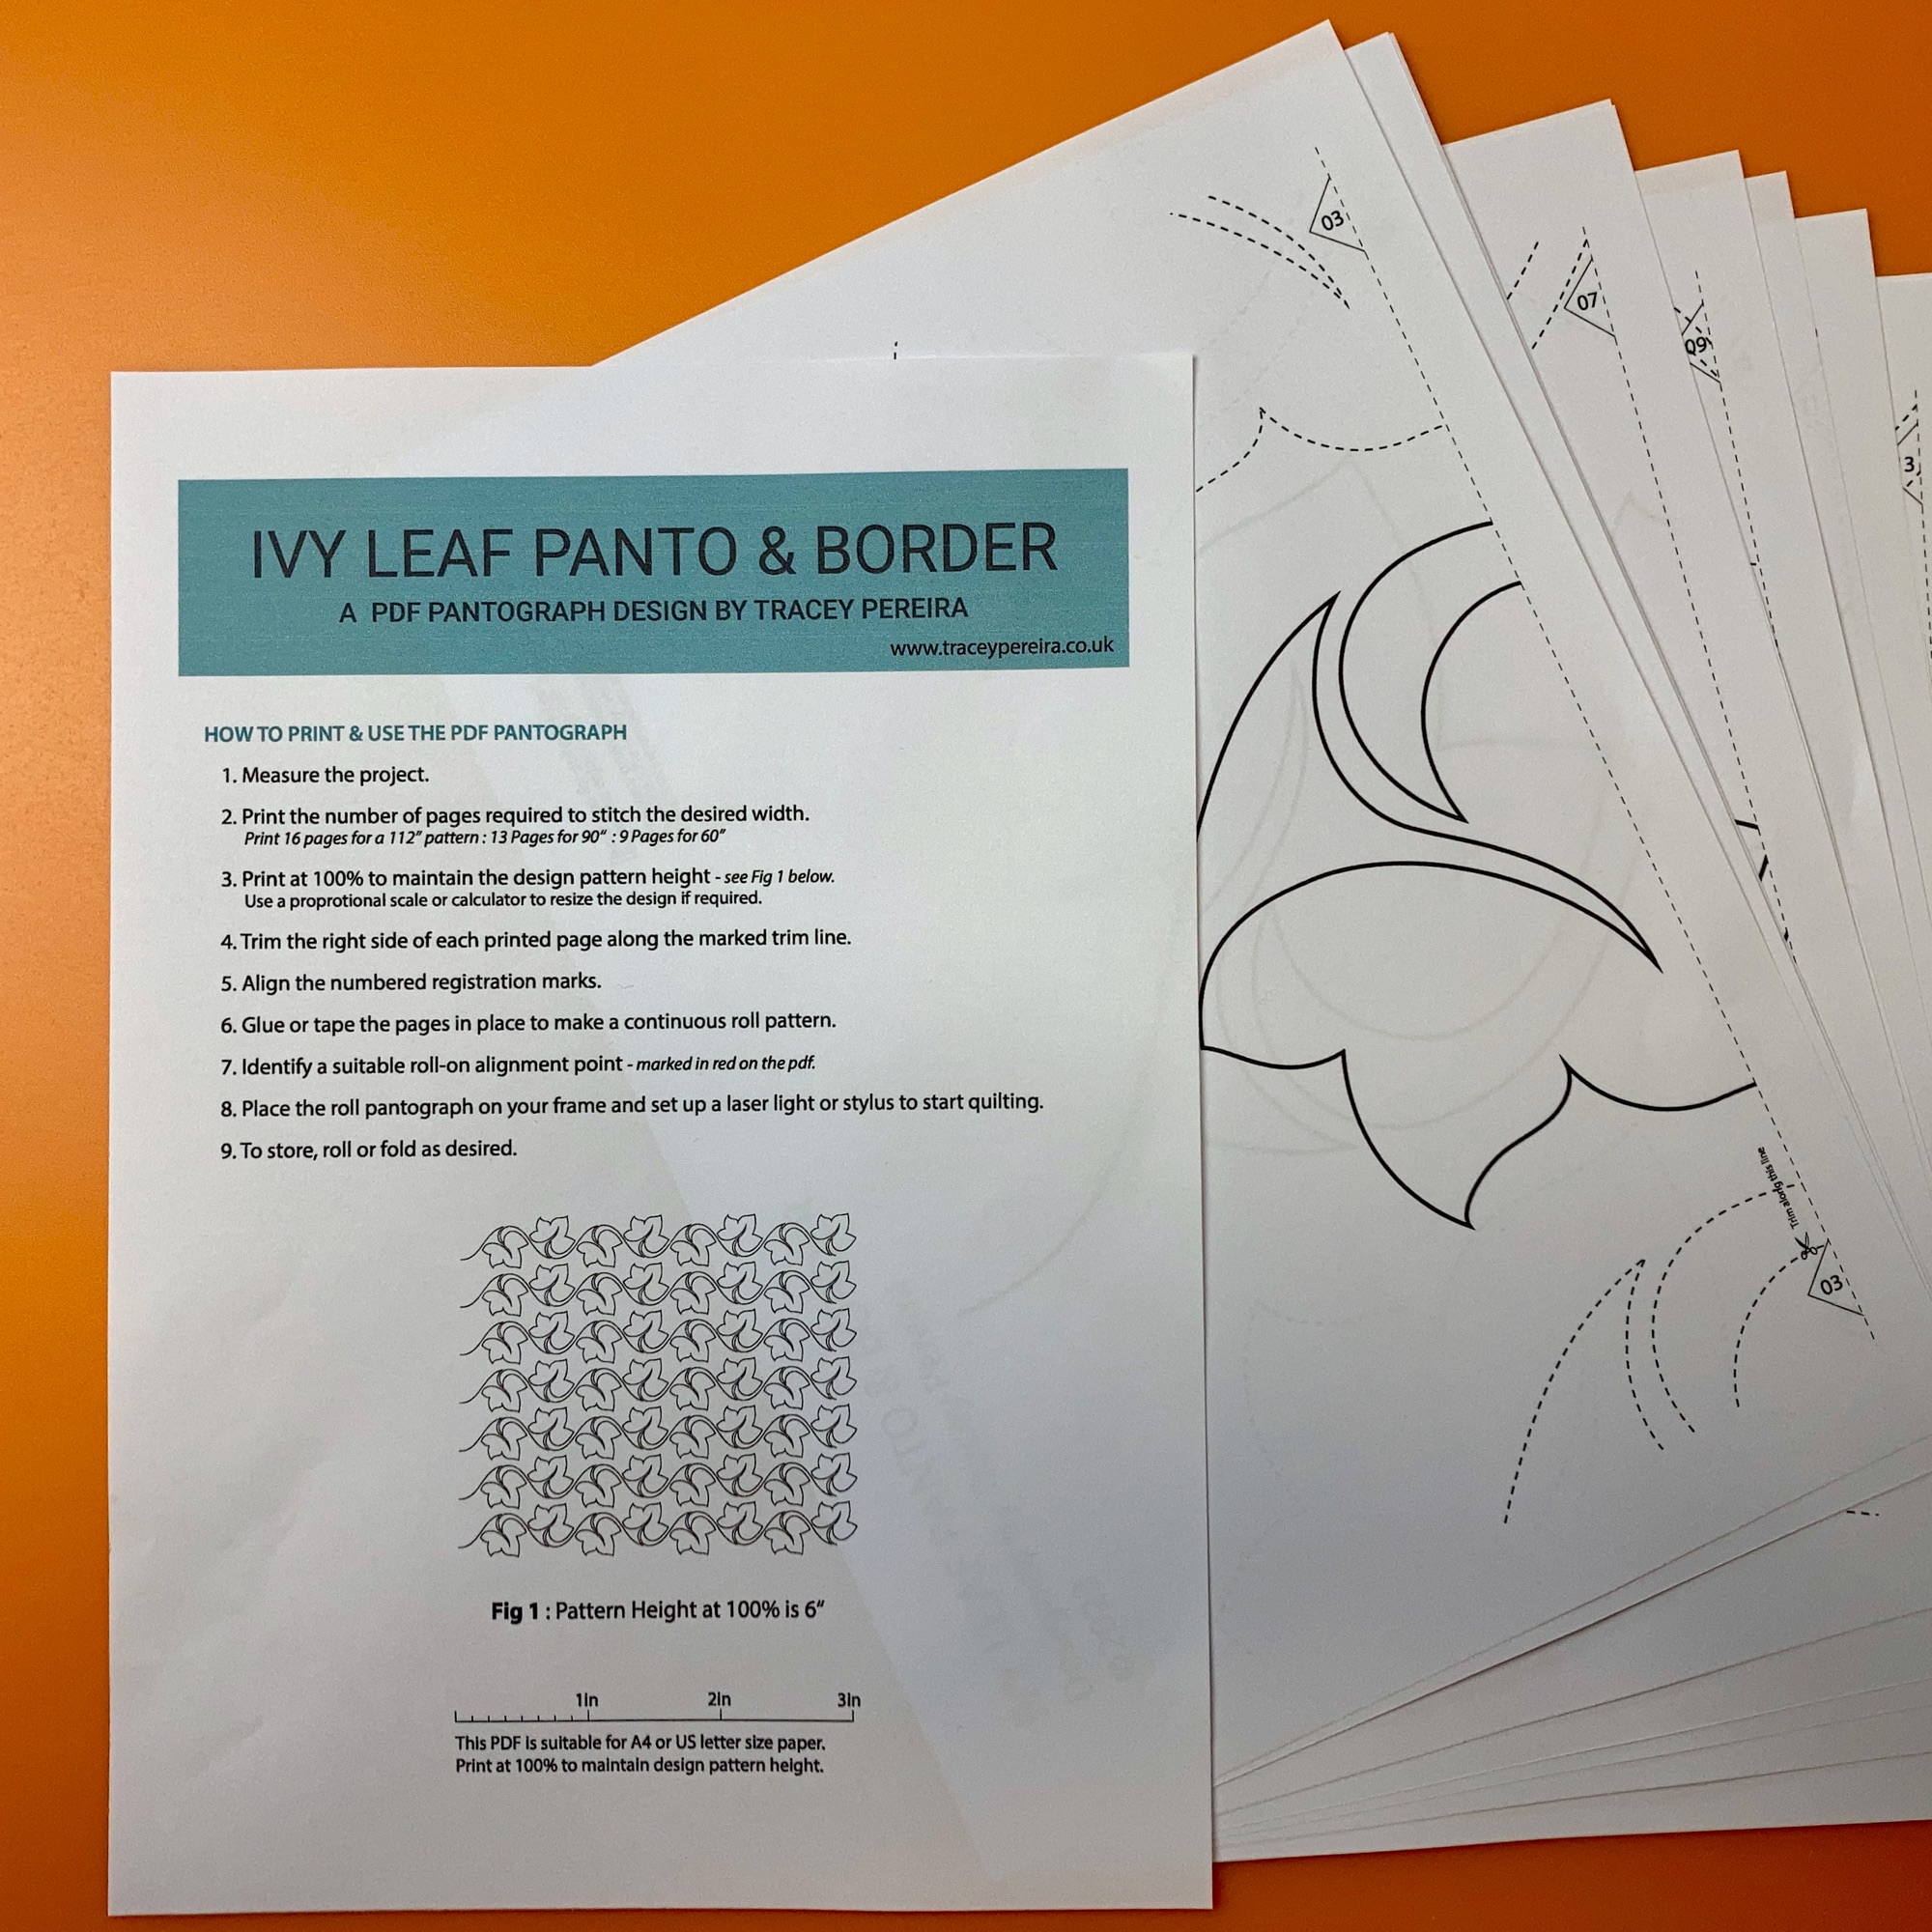
How to Print and Construct your PDF Roll Panto
- Find the PDF pattern in your Downloads Folder.
- Prepare to print the PDF Pantograph.
- The pattern is designed for both A4 and US Letter paper so a little construction work is needed.
- Find the height of the pattern design. Find this on page 1 of the pdf.
- Print at 100% to maintain the pattern height or ...
- Enlarge or Reduce at the print stage if you want to create a larger or smaller pattern to fit sashings and borders .. ie print a 6" pattern at 91% for a pattern height of 5.5".
- Find the trim, connect and registration marks included on each page to help align the pattern.
- Note : Registration alignment marks start at 03.
- Follow the photos below to piece the individual pages into a long roll pattern.
PRINT PAGES
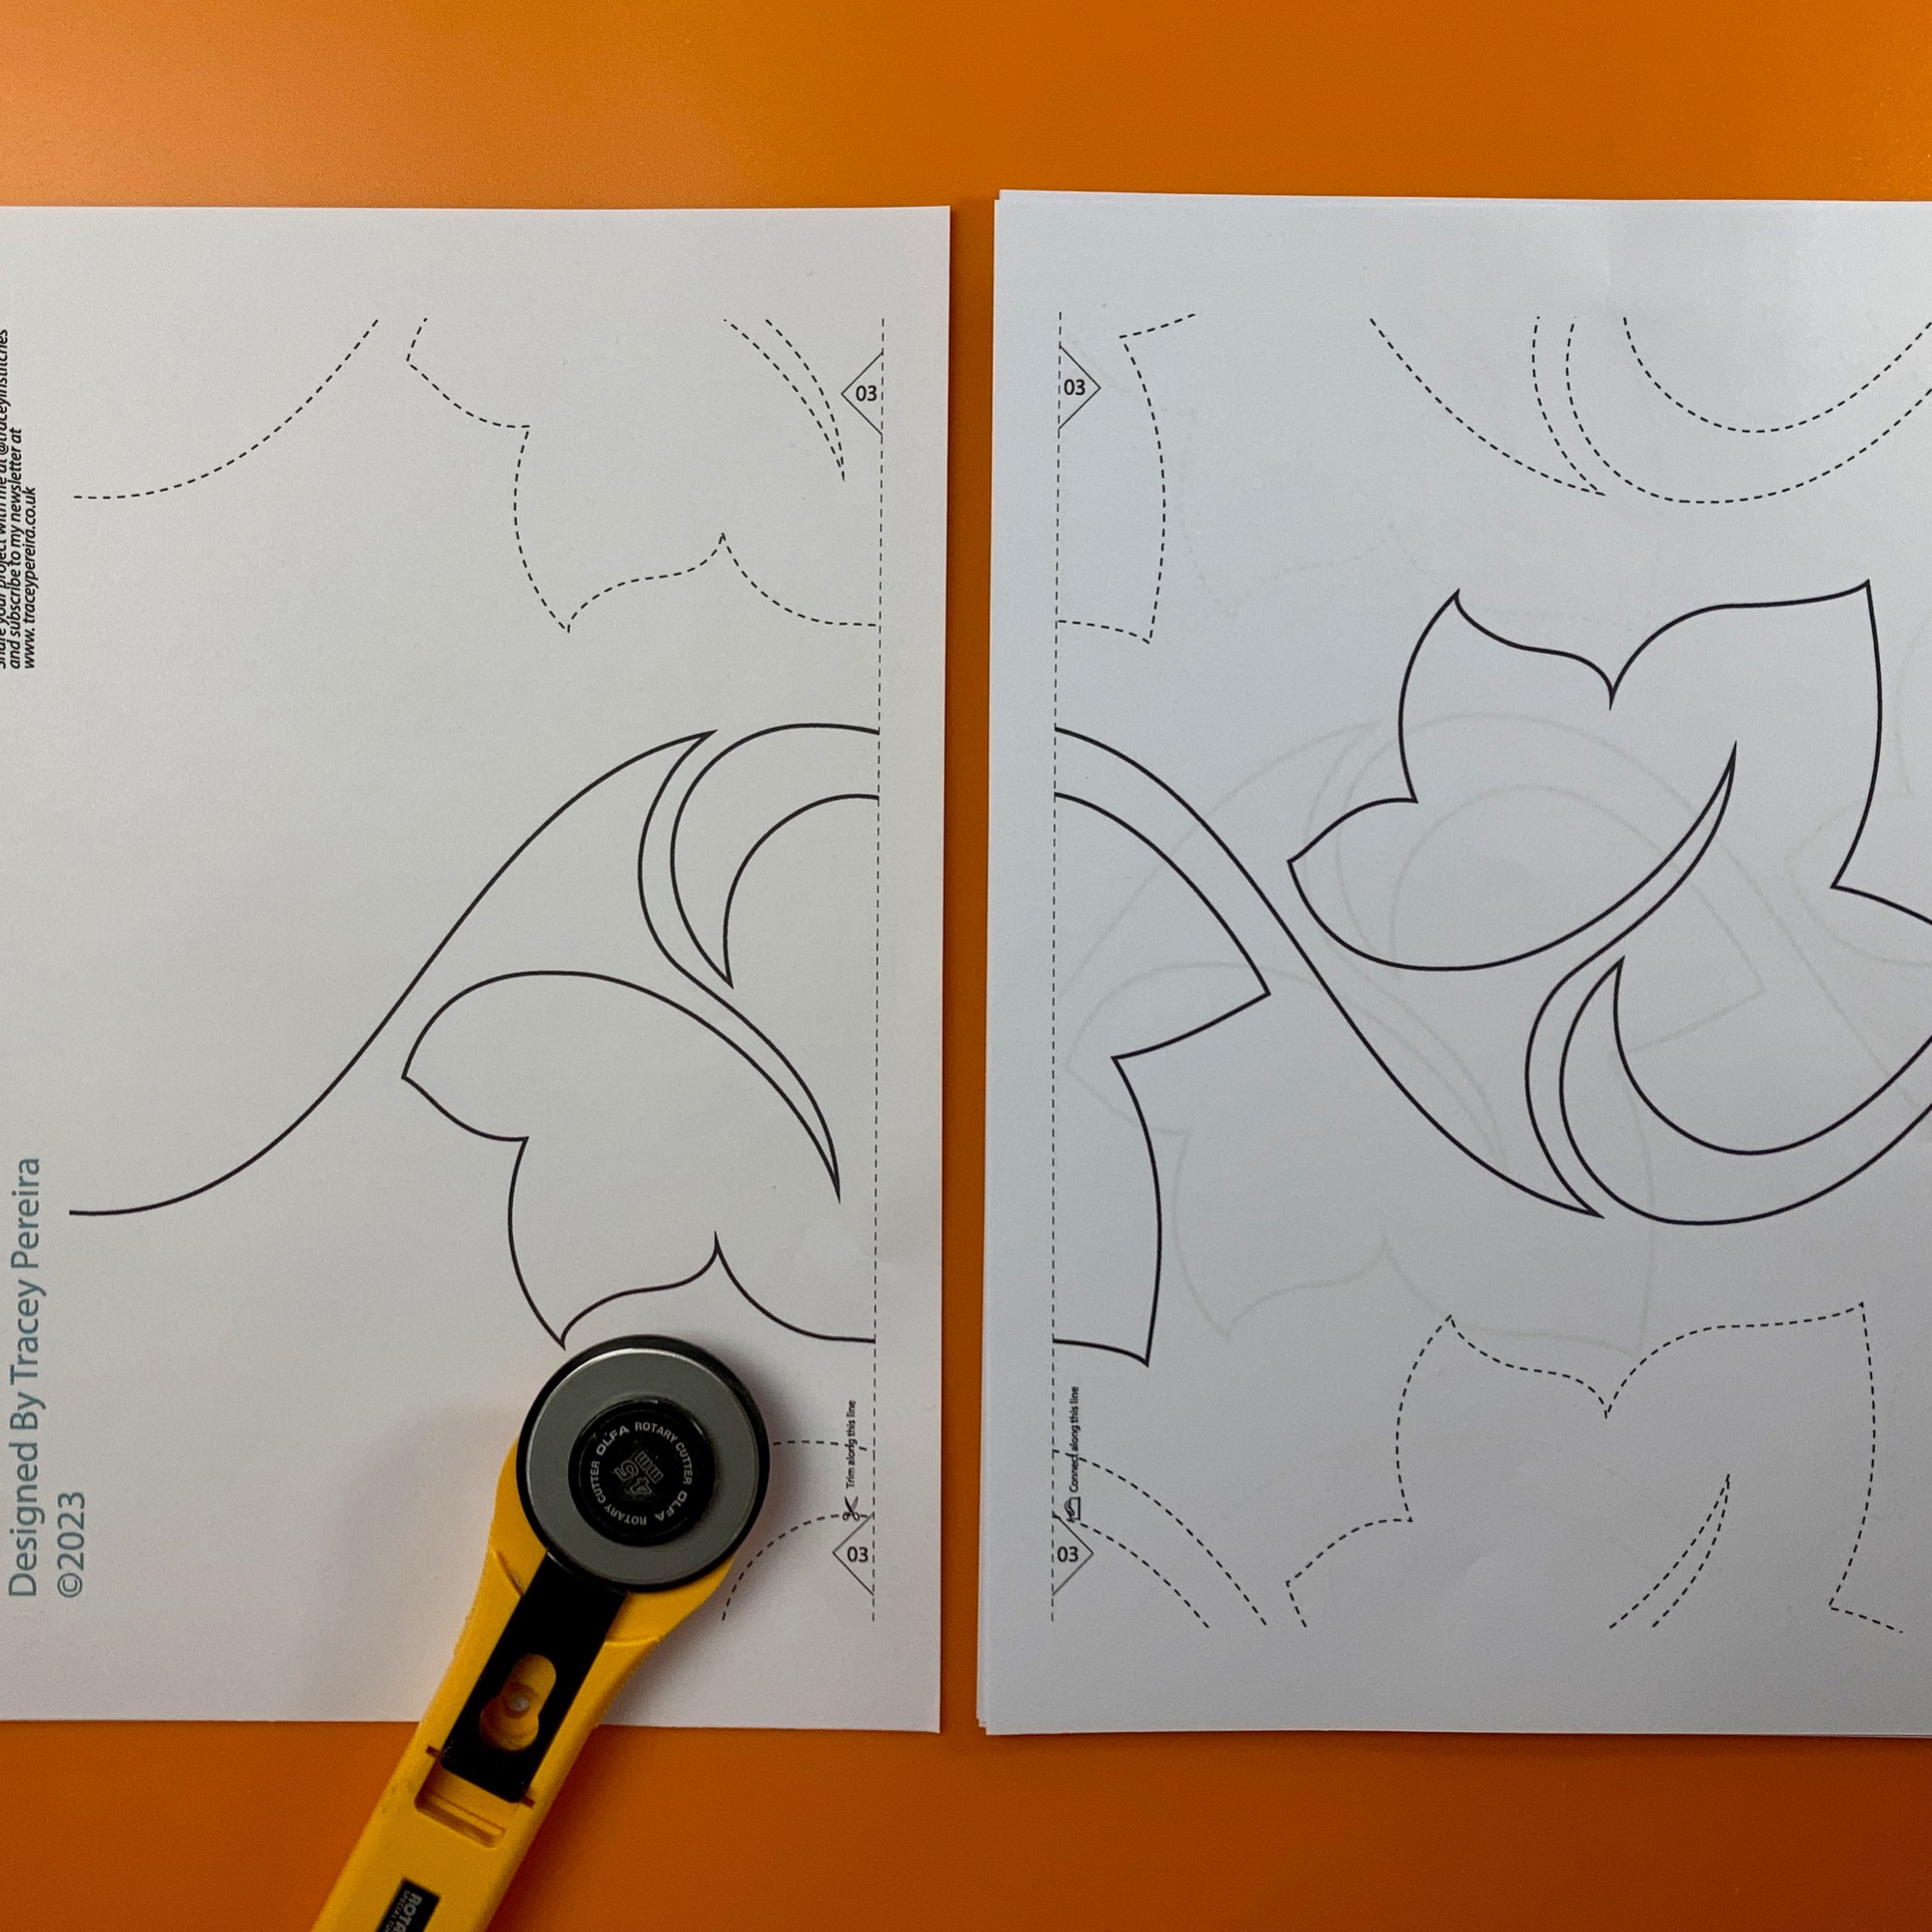
TRIM RIGHT HAND EDGE


REMOVE TRIMMINGS
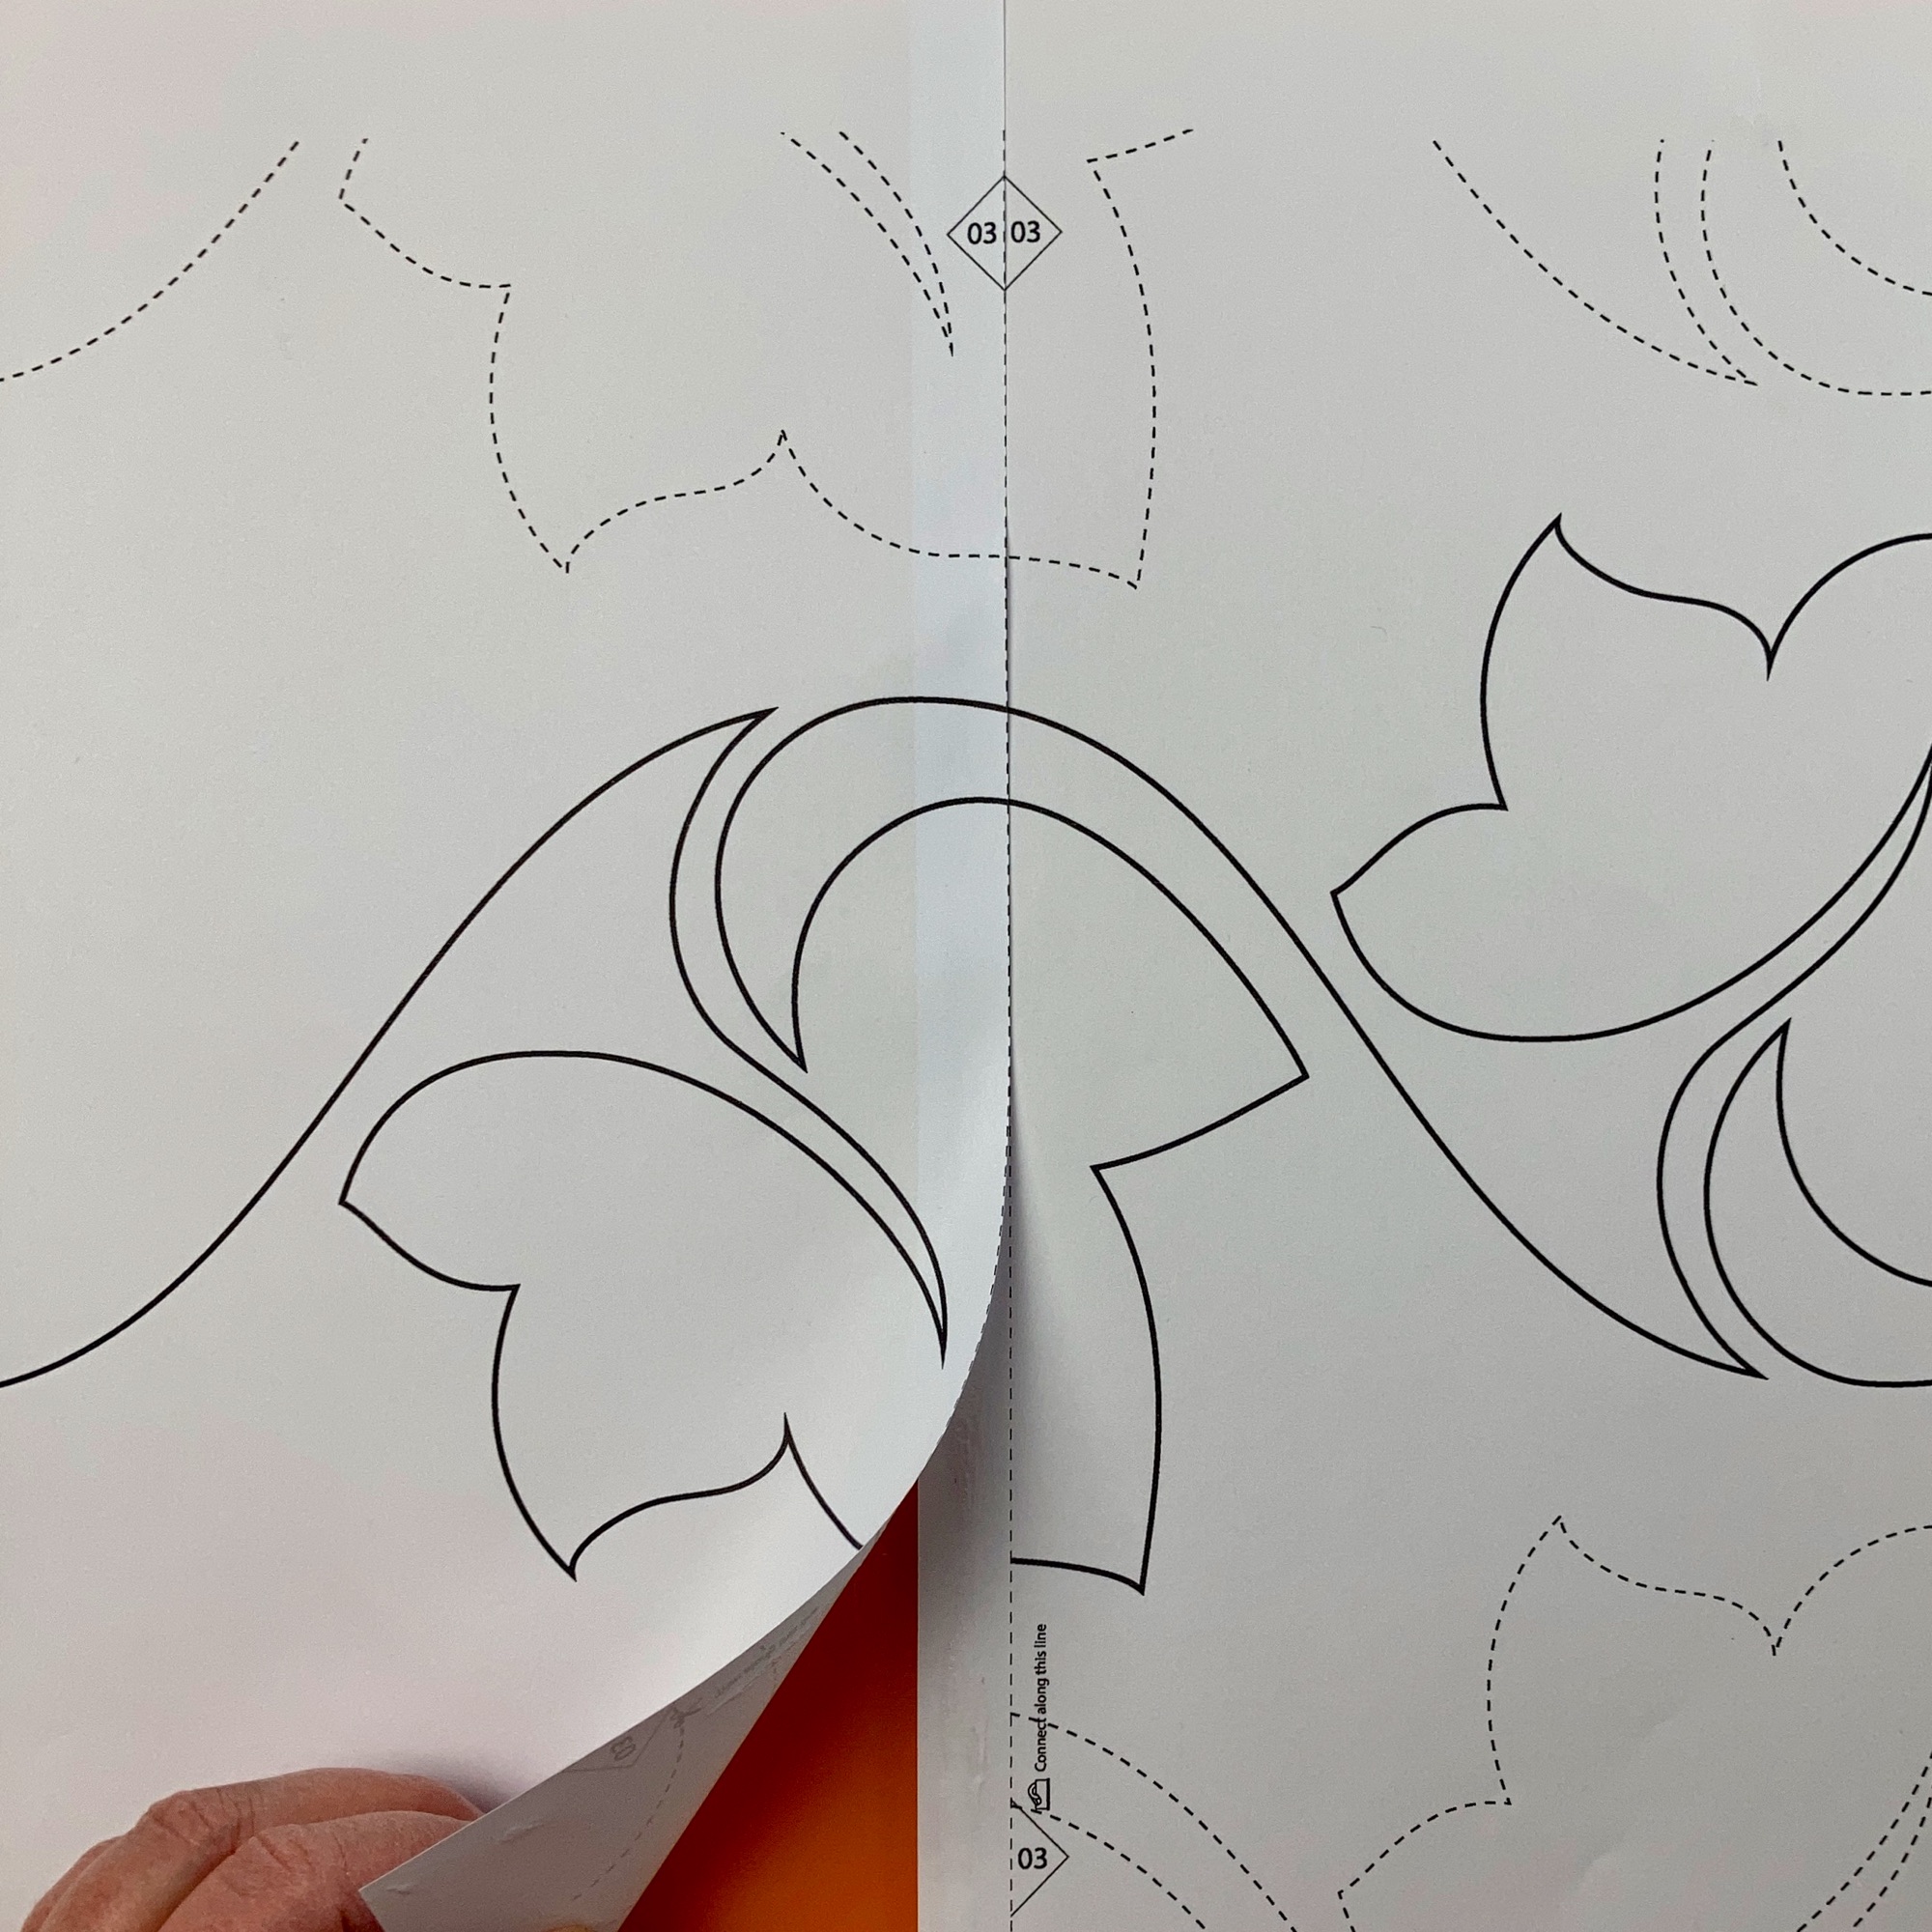
MATCH & ALIGN REGISTRATION MARKS


MATCH & ALIGN TOP/BOTTOM
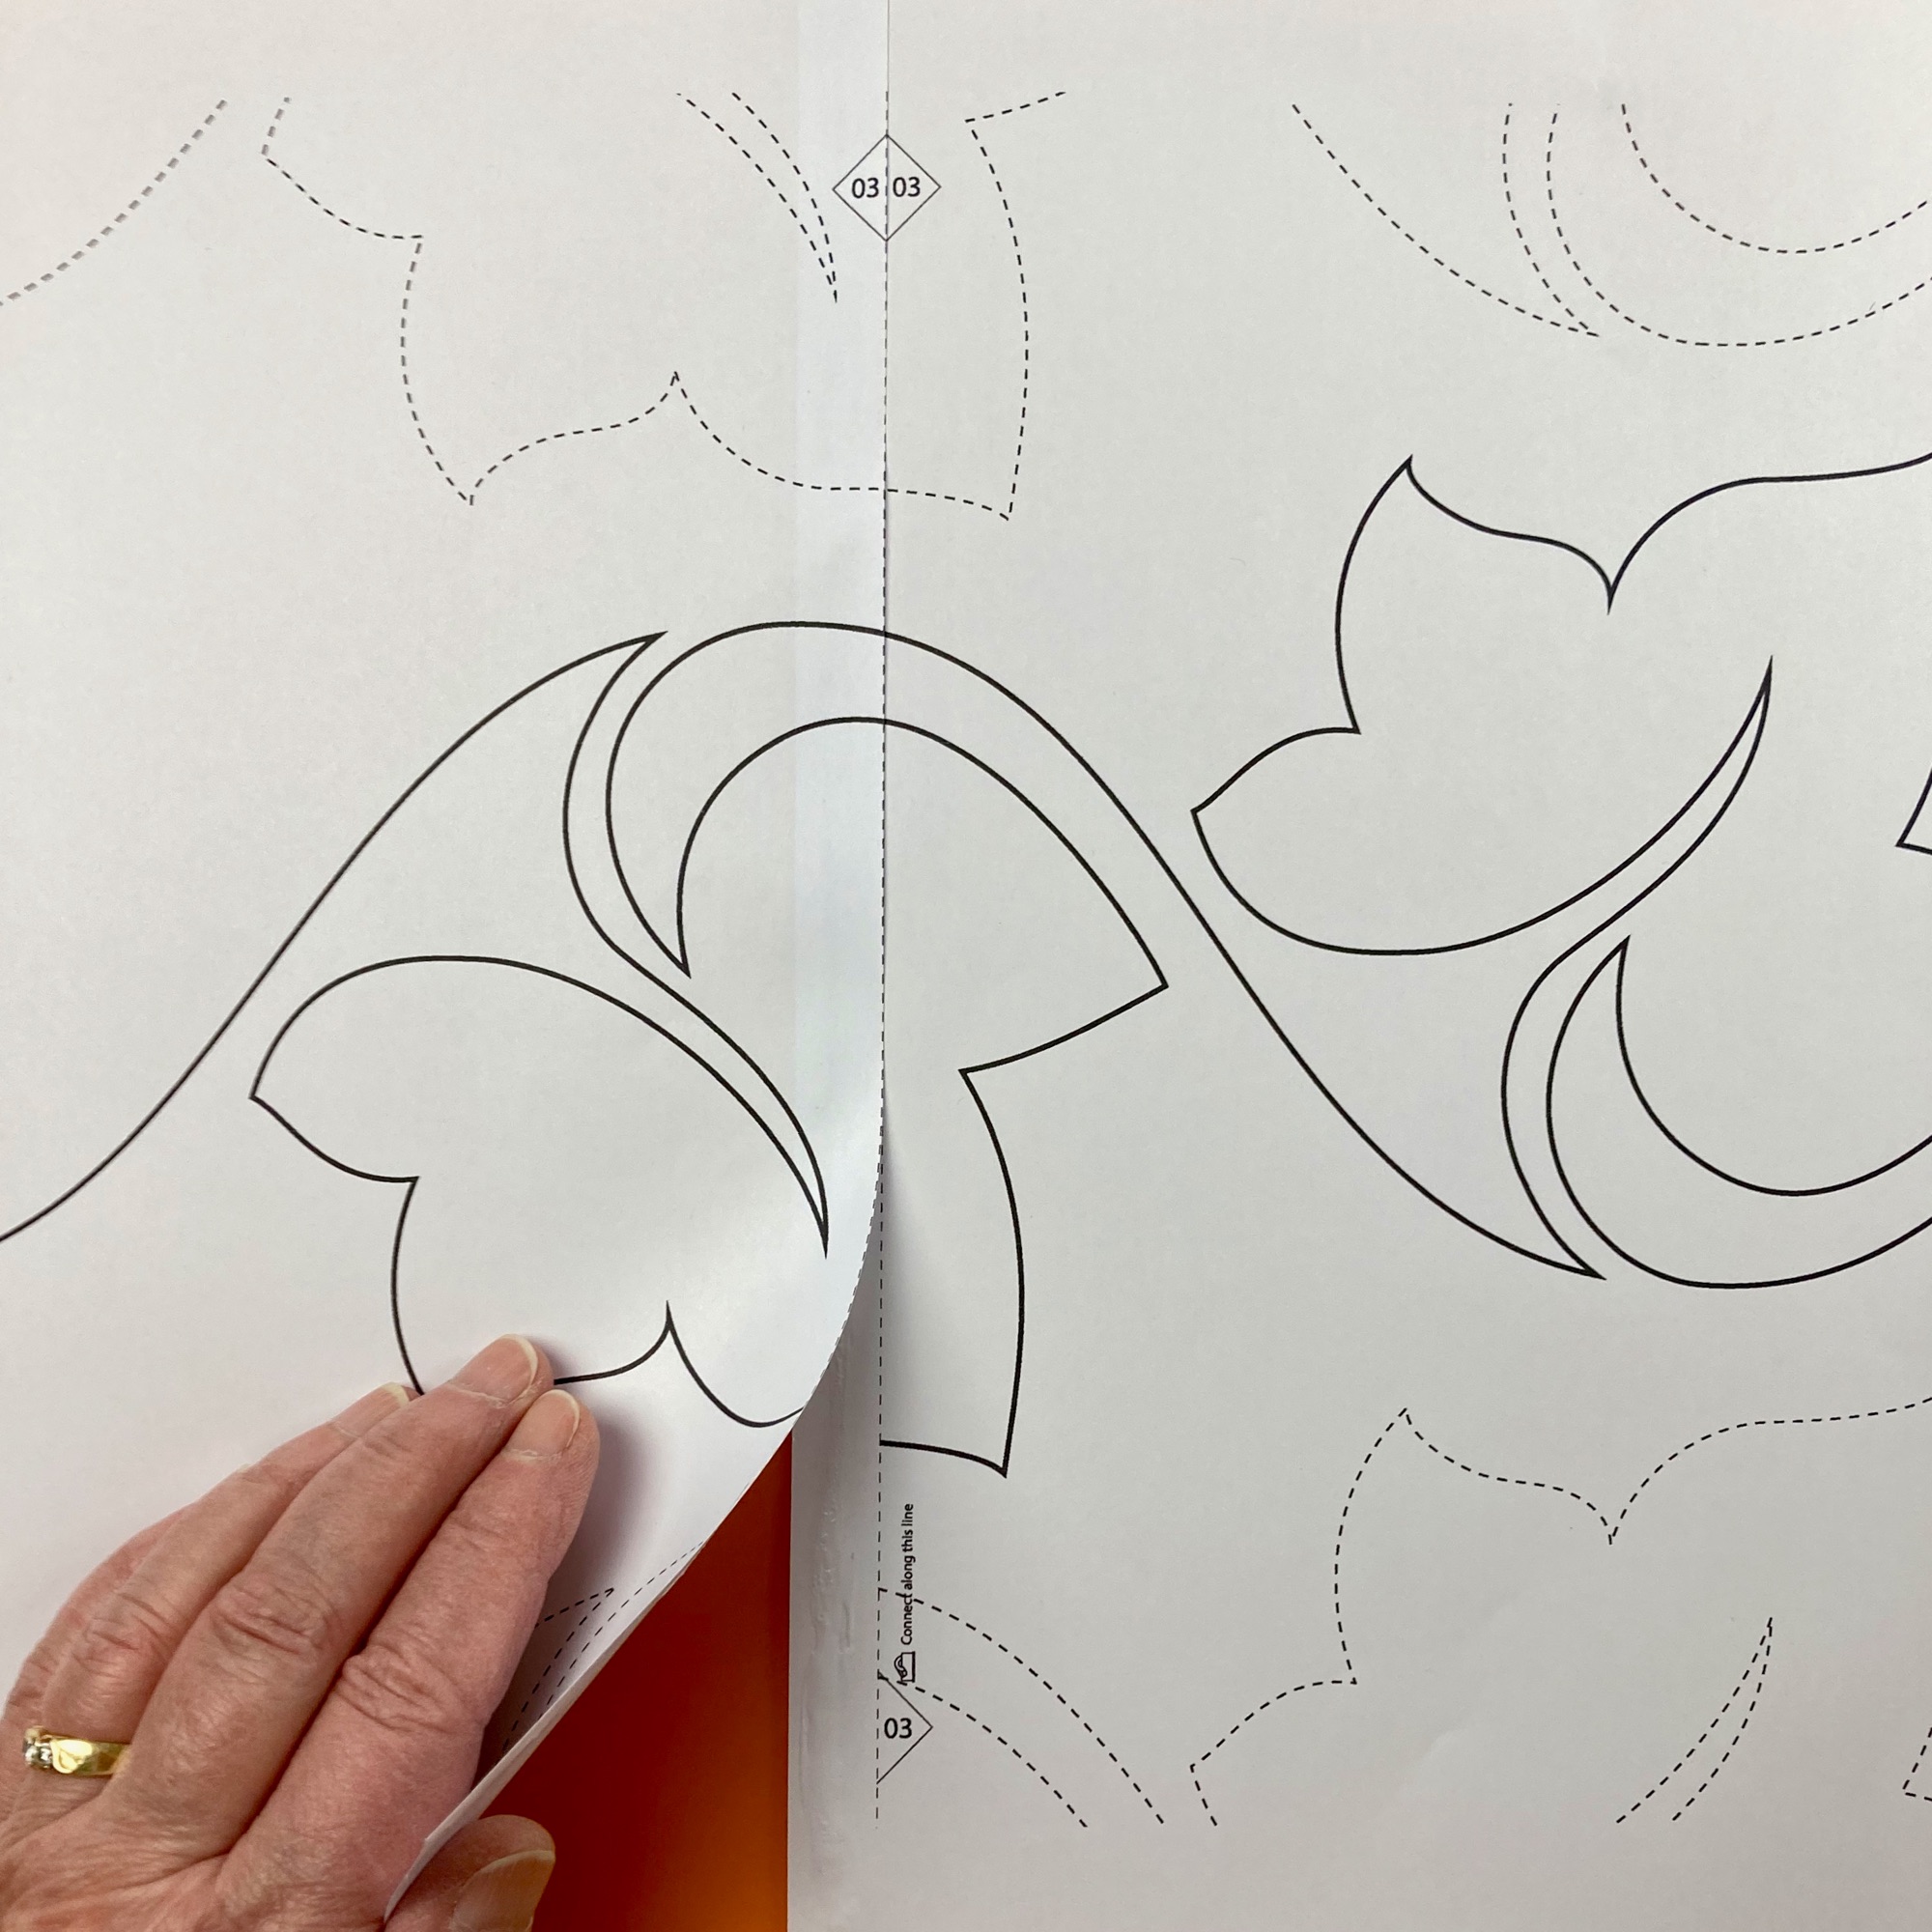

ALIGN SOLID & DASHED PATTERNS
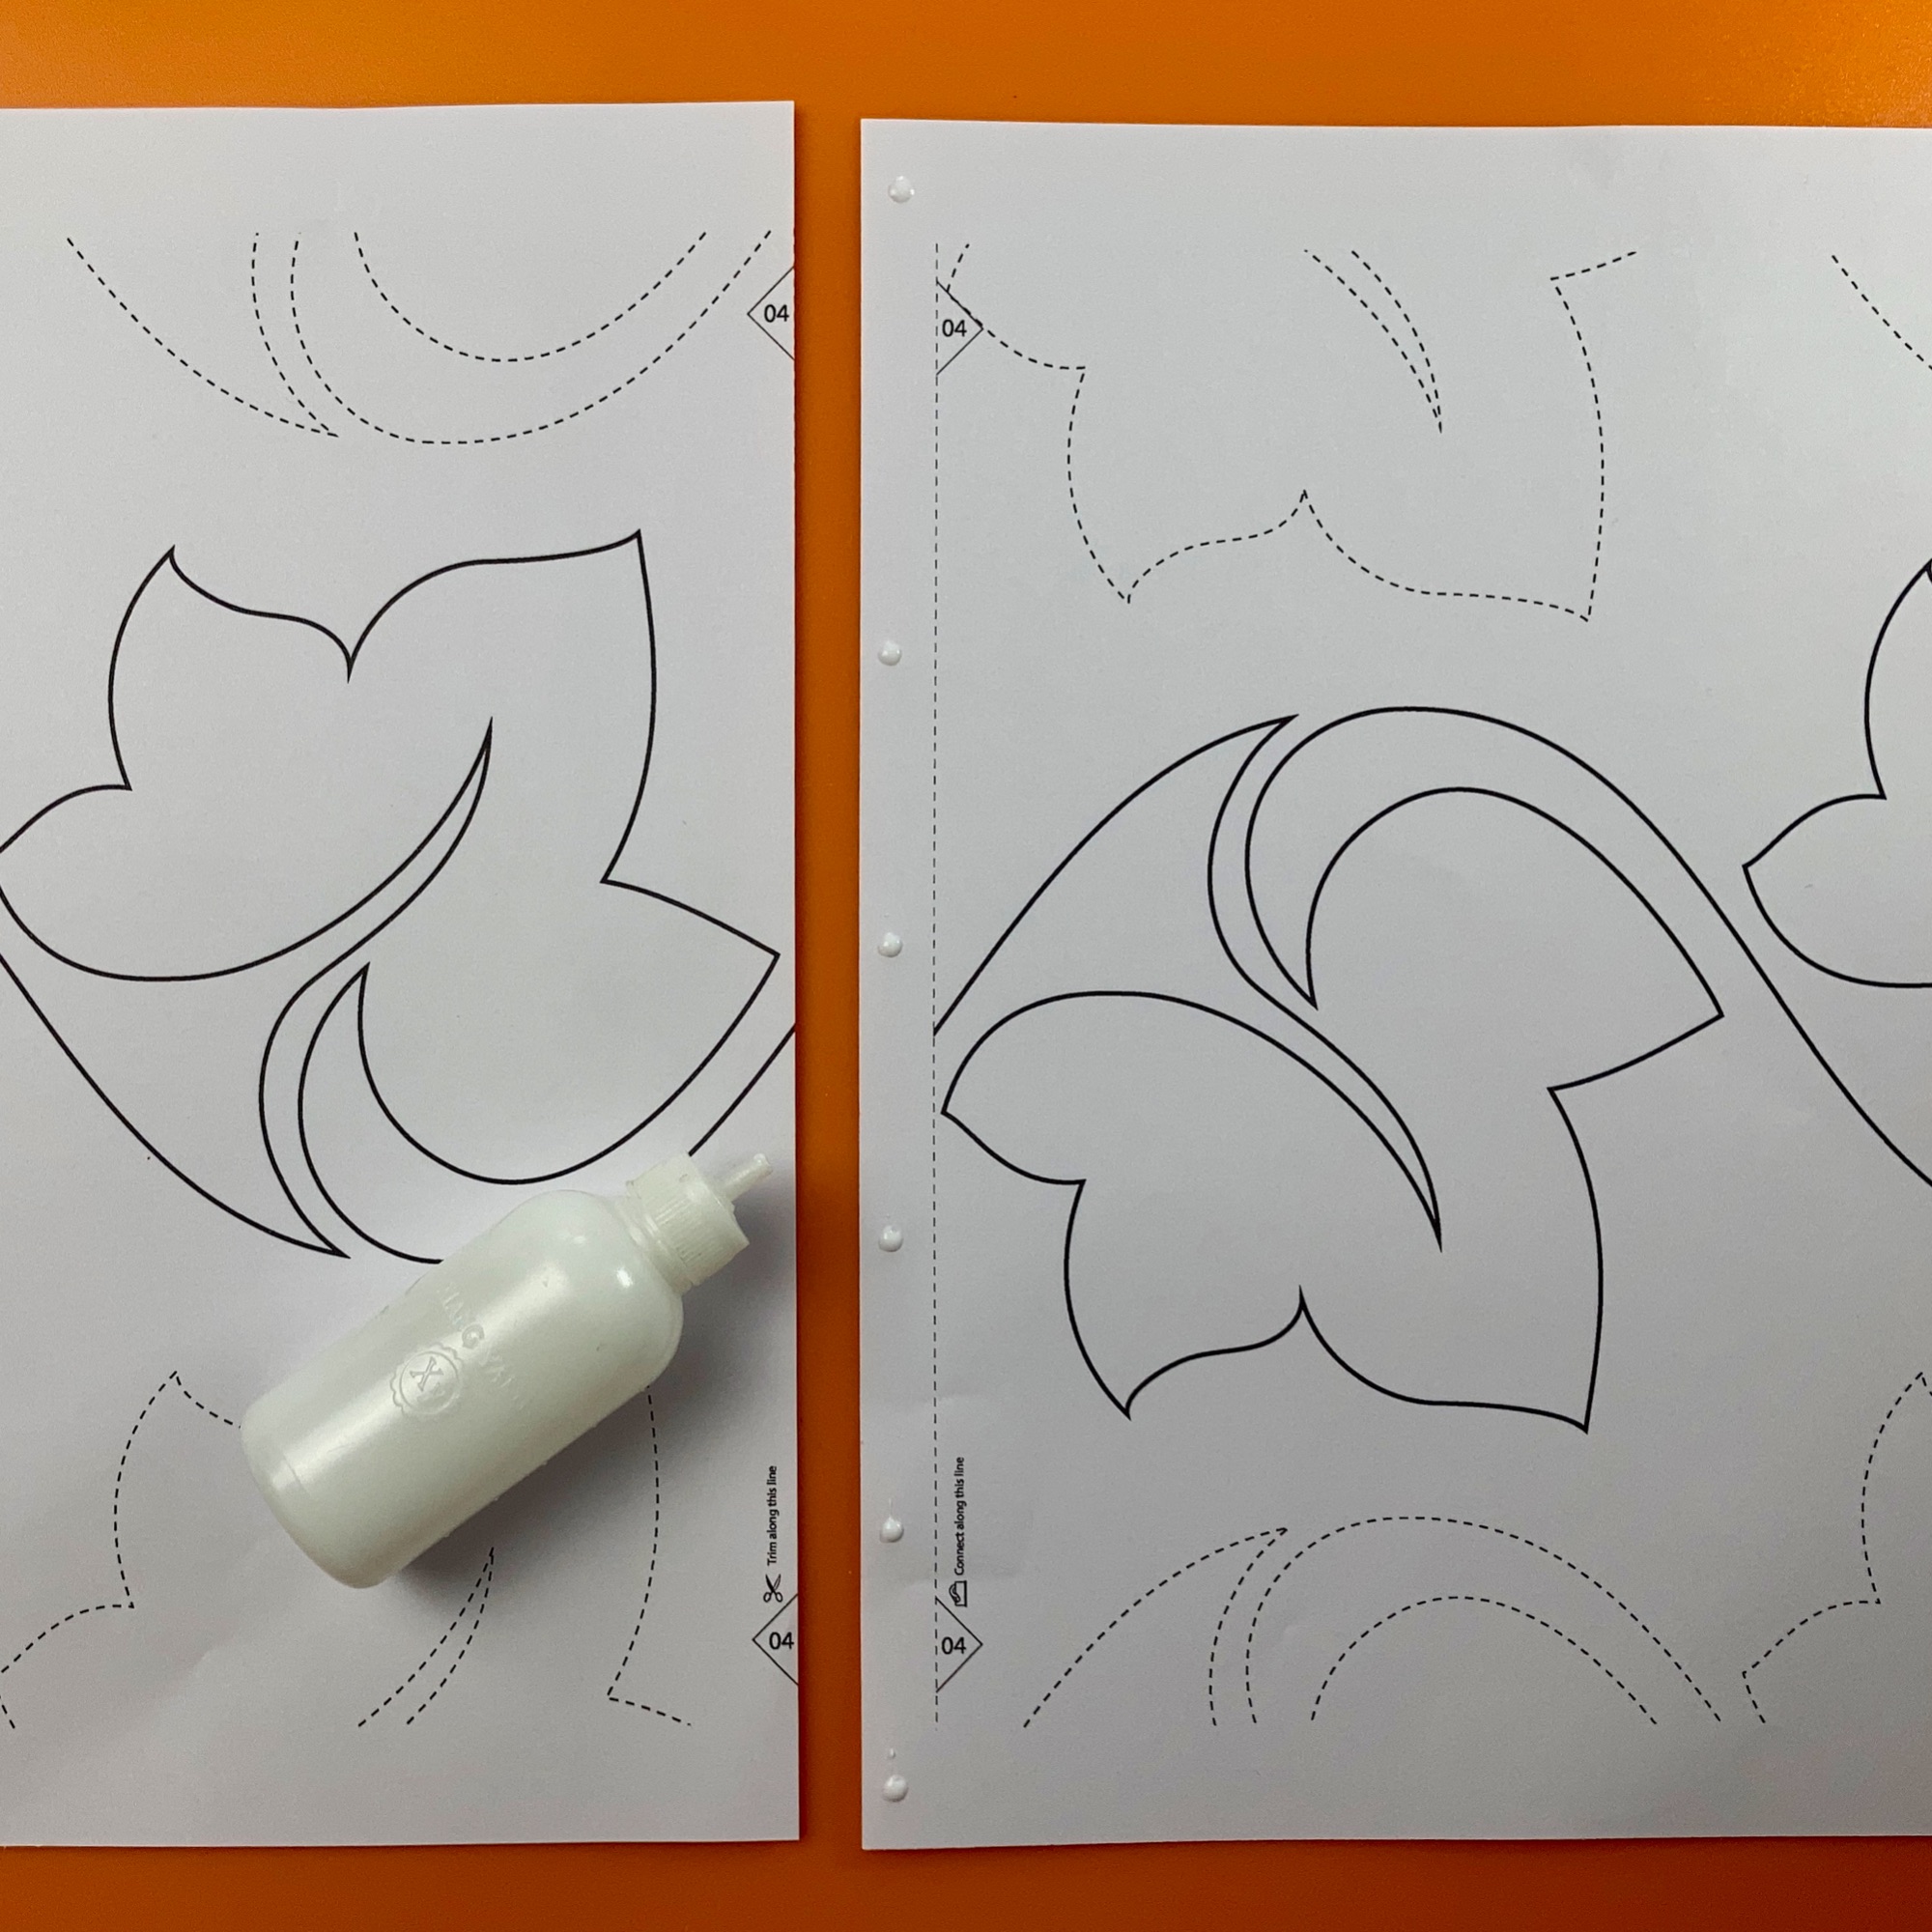
GLUE OR TAPE PAGES IN PLACE
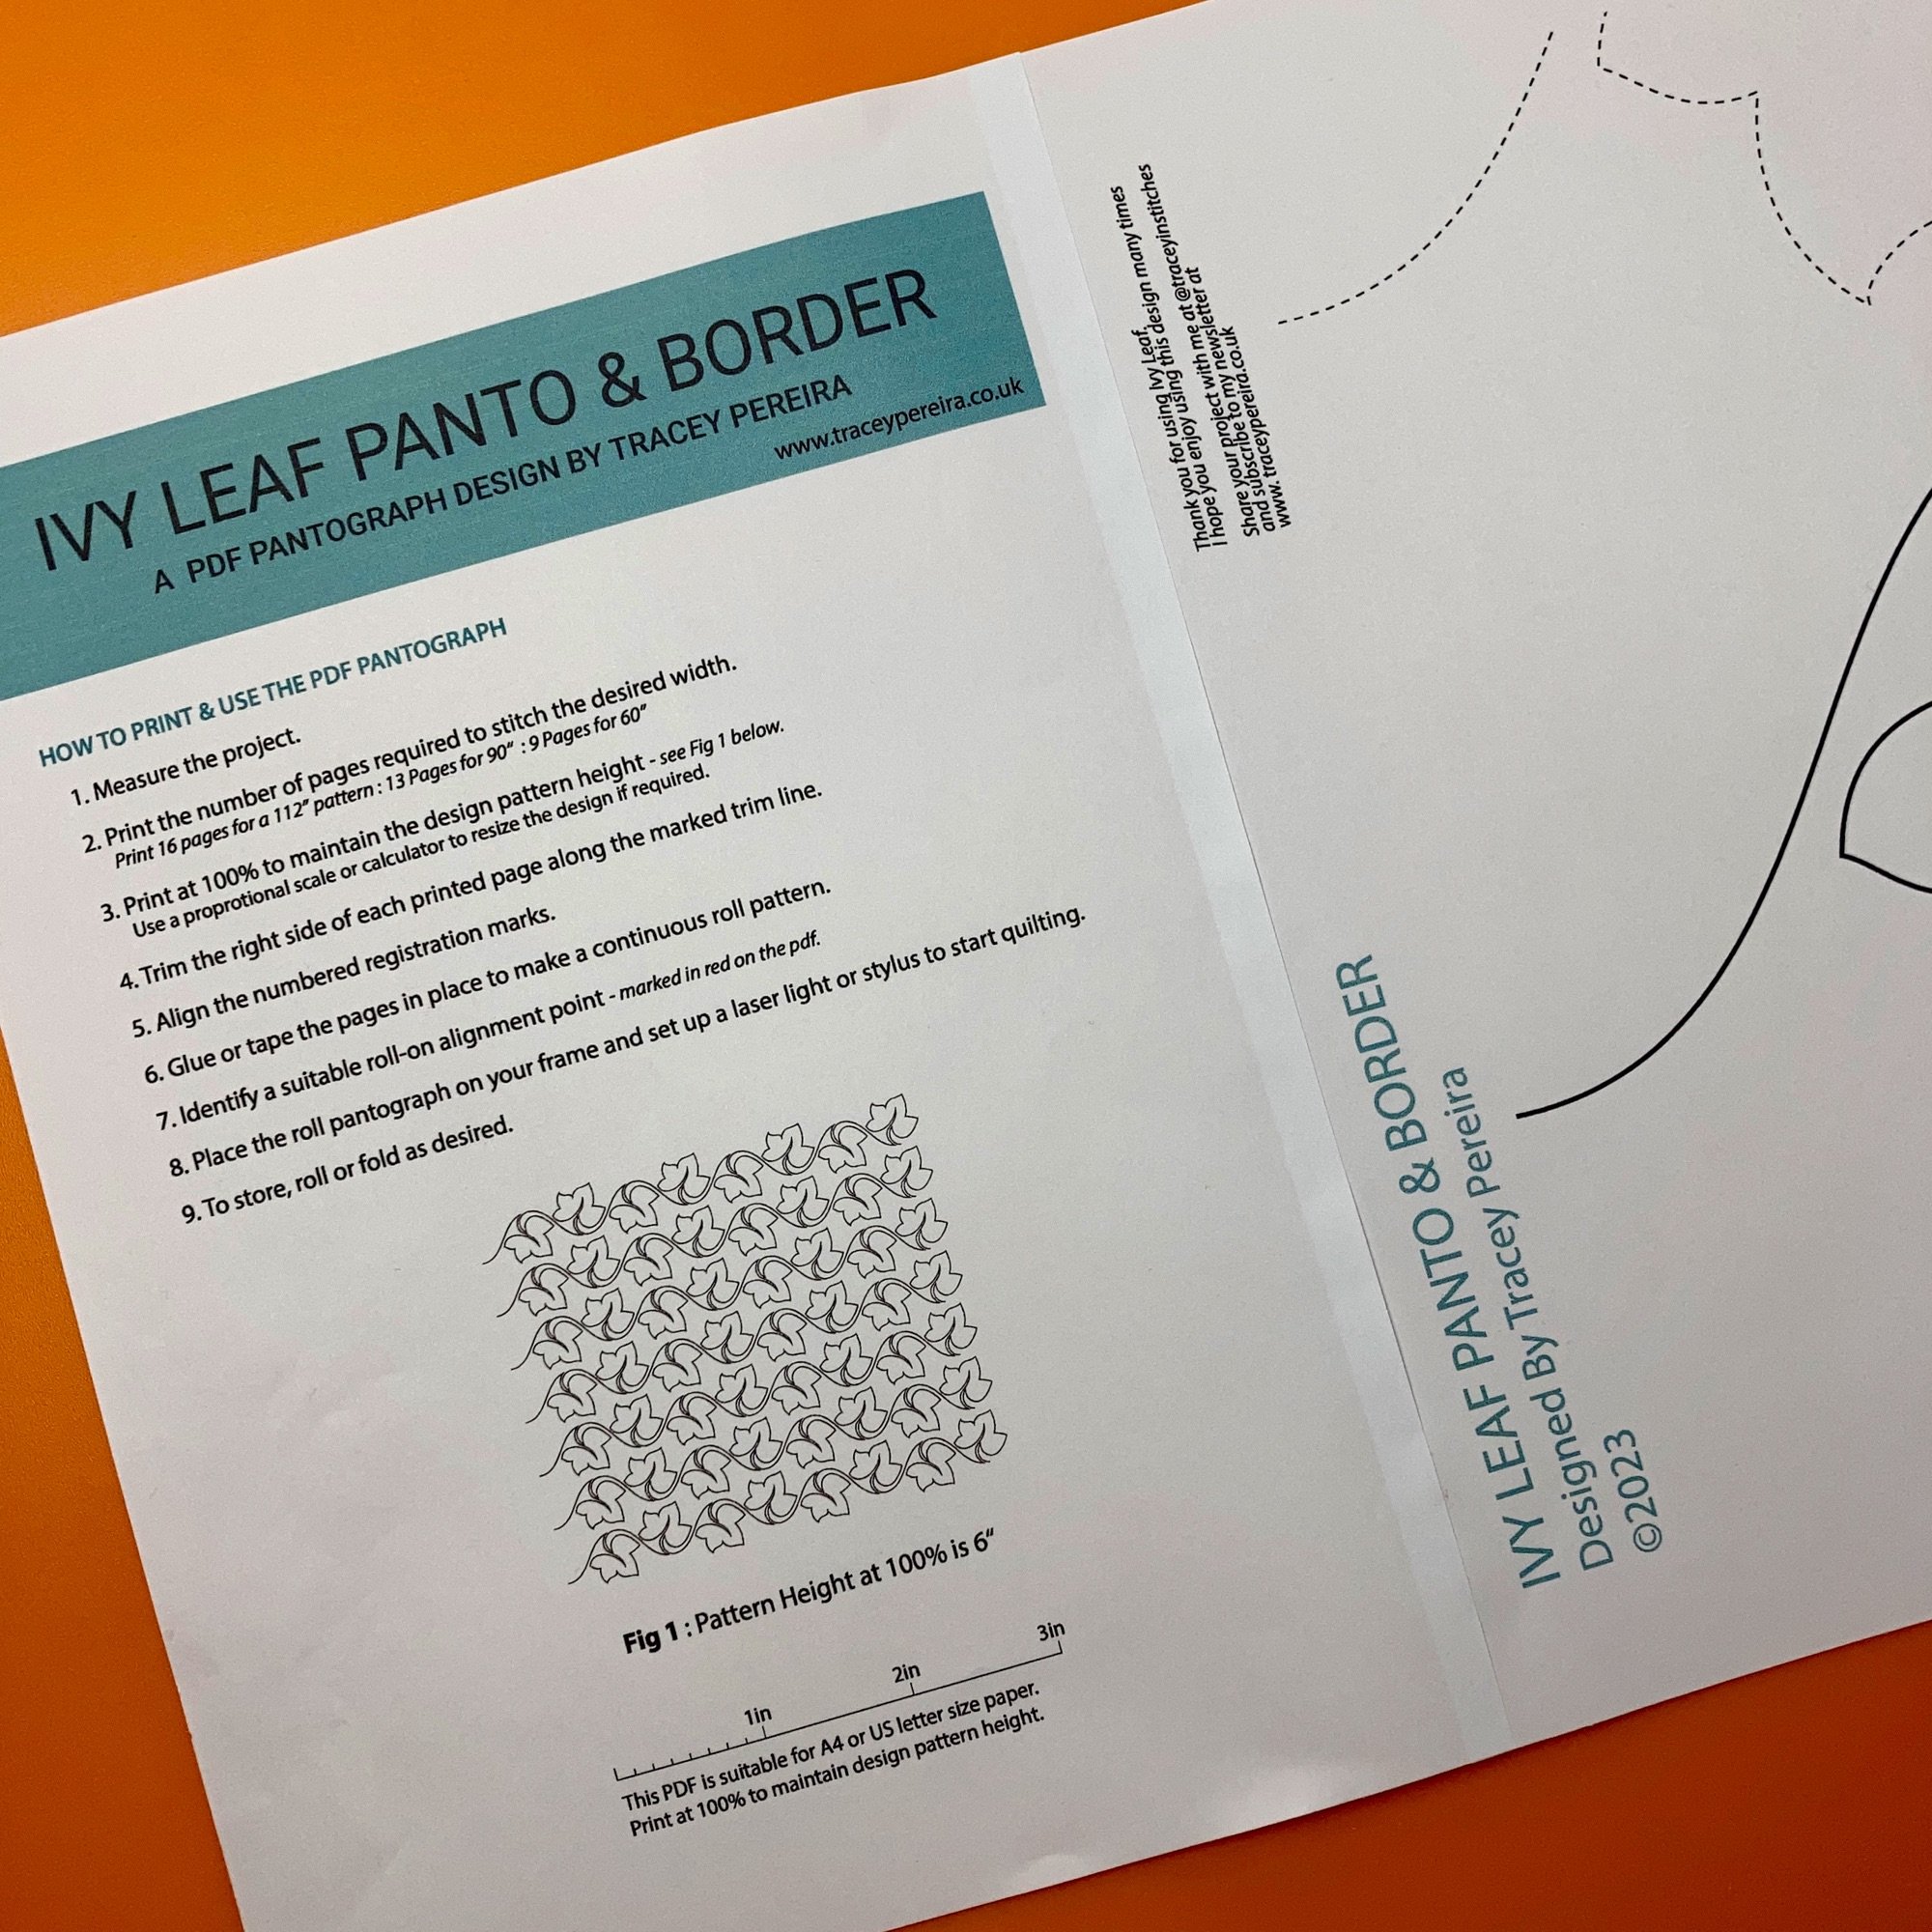
ADD FRONT PAGE FOR REFERENCE

ROLL OR FOLD PATTERN TO STORE
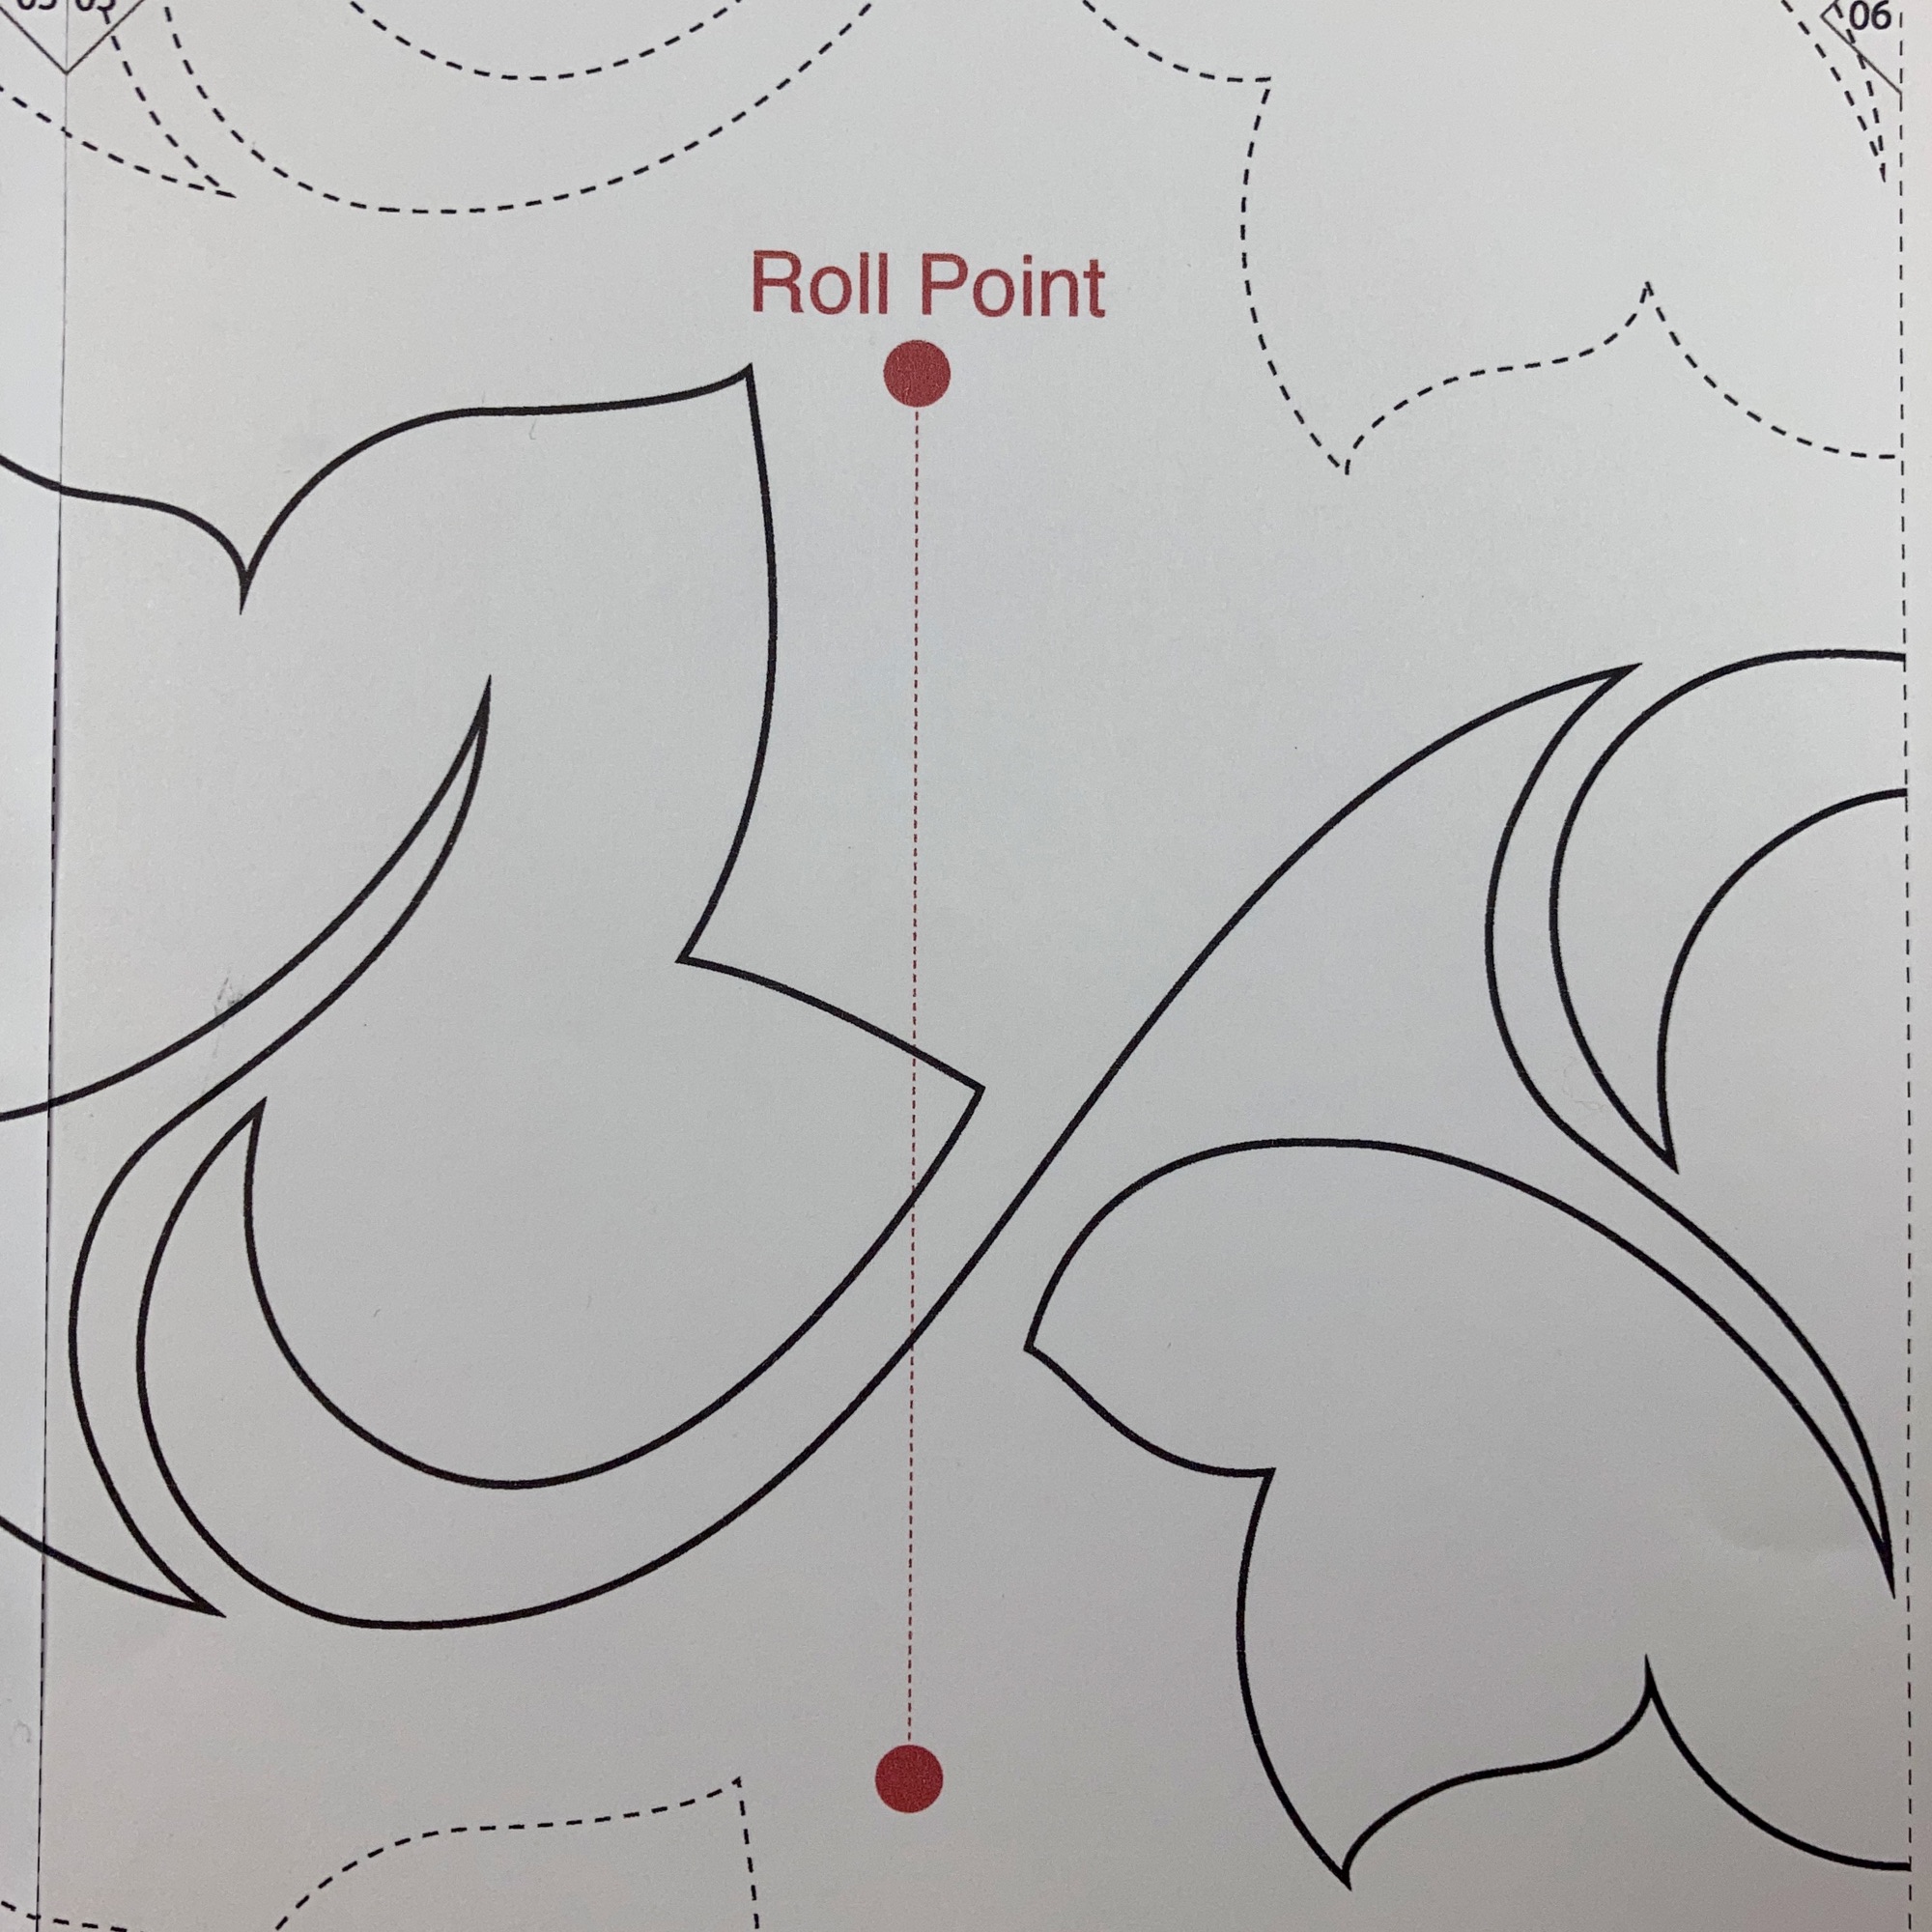
FIND A SUITABLE ROLL POINT FOR QUILTING
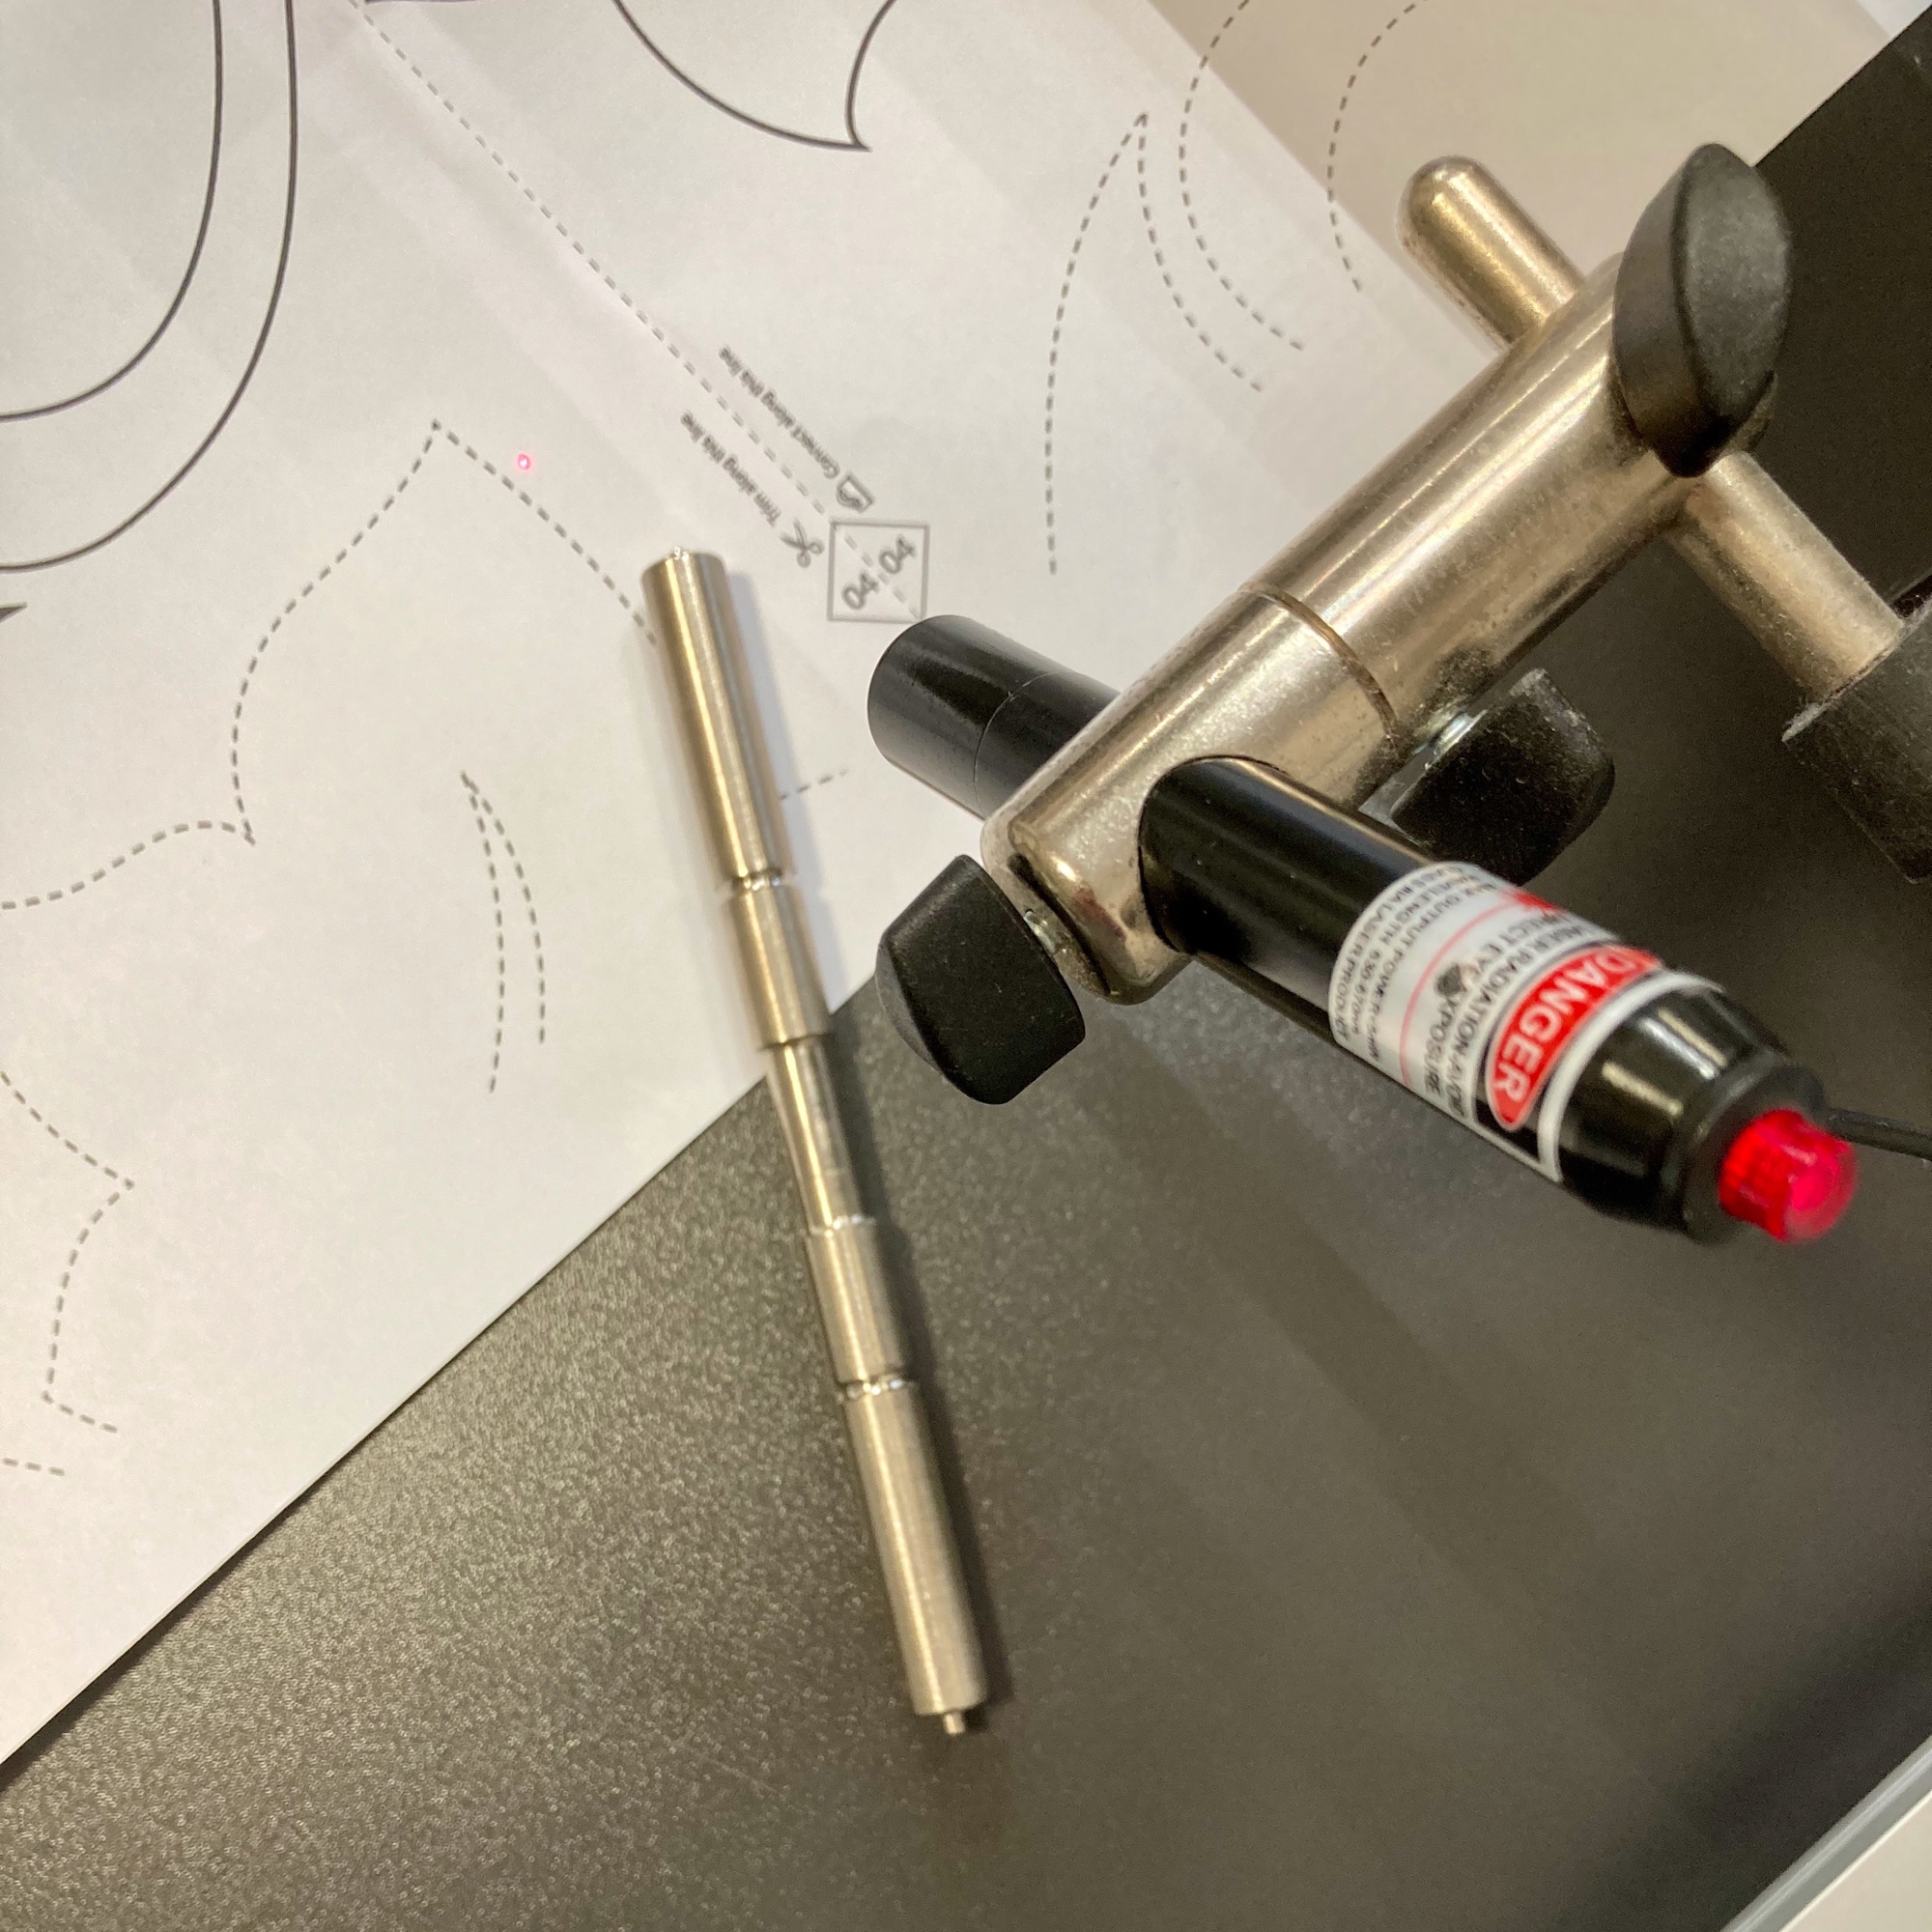
USE LASER or STYLUS TO ALIGN PATTERN WITH QUILT FRAME